Noodle Buns with Tofu Recipe
Another classic vegan bun that you're sure to fall in love with once you try it! Follow my foolproof dough recipe to create fluffy, soft noodle buns that will delight your taste buds.
Servings 5
Calories 500kcal
Ingredients
Dough:
- 500 g all-purpose flour
- 3 g dry yeast
- 275 g warm water 30-40°C
Filling:
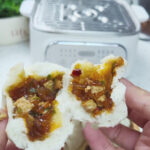
- 100-150 g vermicelli noodles pre-soaked and cut into small pieces
- 1 block of tofu 200-300g, cubed
- 20 g light soy sauce
- 1 tsp dark soy sauce
- 3-5 g salt
- 3-5 g chicken seasoning optional, omit for vegan
- 2 tbsp Pixian Doubanjiang broad bean paste
- 50-80 g preserved mustard zha cai, optional, finely chopped
- 30-50 g cooking oil
- 60 g green onions white part: 20g, green part: 40g
Instructions
Step 1: Prepare the Dough
- In a large bowl, combine 500g of flour and 3g of yeast.
- Gradually pour 275g of warm water into the flour while stirring continuously. Continue mixing until a shaggy dough forms.
- Knead the dough on a floured surface for 8-10 minutes until it becomes smooth and elastic. The dough should be slightly tacky to the touch.
- Cover the dough with a damp cloth or plastic wrap and let it rest in a warm place for about 1 hour, or until it doubles in size.
Step 2: Prepare the Filling
- Soak the vermicelli noodles in warm water for 20-30 minutes until soft. Drain and cut into smaller pieces if necessary.
- Cut the tofu into small cubes (about 1-1.5 cm). Set aside.
- Finely chop the preserved mustard (zha cai). If it's too salty, rinse it under water before chopping.
- In a large bowl, mix the softened noodles, tofu, and zha cai. Add the light soy sauce, dark soy sauce, oyster sauce, salt, chicken seasoning (if using), and Pixian Doubanjiang. Stir to combine.
- Add white parts of the green onions. Heat 30-50g of cooking oil in a small pan until it reaches 70-80% heat (just starting to smoke). Carefully pour the hot oil over the filling mixture and stir to combine. This step helps release the full aroma of the seasonings.
- Finally, add the green parts of the green onions and mix everything together. The filling is now ready.Chill the filling in the fridge for 30 minutes. This makes it easier to handle when shaping the buns.
Step 3: Shape the Buns(Check out my beginner-friendly slow-motion tutorial on how to wrap buns!)
- Once the dough has doubled in size, punch it down to release the air. Knead it briefly and shape it into a log.
- Divide the dough into 20 equal portions and roll each piece into a ball.
- Take one dough ball and roll it out into a circle, with the edges thinner than the center.
- Place a spoonful of the filling in the center of the dough circle. Carefully gather the edges and pleat the dough around the filling, sealing the bun at the top. Make sure to pinch the seam tightly to prevent it from opening during steaming.
- Place the shaped buns on parchment paper squares to prevent sticking.
Step 4: Second Rise and Steaming
- Arrange the buns in a steamer, leaving enough space between each one for expansion.
- Let the buns rise for a second time in a warm, moist environment for 15-20 minutes, or until they puff up slightly. You can place the steamer in a warm spot or over a pot of warm water (without turning the heat on).
- Once the buns have risen, bring a large pot of water to a boil.
- Steam the buns over high heat for 15 minutes. Keep the heat steady to ensure even cooking.
- After 15 minutes, turn off the heat and let the buns rest in the steamer for an additional 3-5 minutes before opening the lid. This will help prevent the buns from shrinking.
Video
Nutrition
Calories: 500kcal | Carbohydrates: 95g | Protein: 12g | Fat: 7g | Saturated Fat: 1g | Polyunsaturated Fat: 2g | Monounsaturated Fat: 4g | Trans Fat: 0.02g | Sodium: 497mg | Potassium: 164mg | Fiber: 4g | Sugar: 1g | Vitamin A: 135IU | Vitamin C: 2mg | Calcium: 34mg | Iron: 5mg