Taro paste is simple to make and incredibly versatile, making it perfect for a range of Chinese pastries. Follow my recipe to create this delicious filling.
Why Make Homemade Taro Paste?
Taro paste is a smooth, creamy filling made from steamed taro root, often sweetened and enriched with ingredients like condensed milk, butter, and sugar.
Like red bean paste, this versatile paste is commonly used in various Asian desserts, including mooncakes, pastries, and steamed buns.
Its mild, nutty flavor and smooth texture make it a popular choice for fillings, and it can be easily shaped or spread, depending on the recipe.
Use Purple Sweet Potato and Adjust Milk
In this recipe, I use purple sweet potato to give the paste a subtle purple hue. If you don’t have purple sweet potatoes, you can skip it.
Some recipes call for milk to enhance the flavor, but I’ve found that while milk adds a creamy taste, it also increases the moisture and significantly extends the cooking time.
Without milk, the cooking time is around 10 minutes. With milk, it can stretch to about 50 minutes. Add milk if you prefer, but adjust based on your taste and the texture you want.
How to Make Taro Paste for Taro Milk Tea
Taro paste can also be used to make taro milk tea with tapioca pearls, a popular drink. To prepare this, in addition to condensed milk and sugar, add 250 ml of milk to the steamed taro and purple sweet potato, then blend until smooth. This will give you the perfect taro paste for your taro milk tea.
Ingredients:
- 800g taro, peeled and cut into pieces
- 100g purple sweet potato
- 50g condensed milk
- 30g butter
- 100g sugar
Instructions:
Steam the Vegetables: Steam the peeled taro and purple sweet potato in a pot for 20-30 minutes, until you can easily poke through them with chopsticks.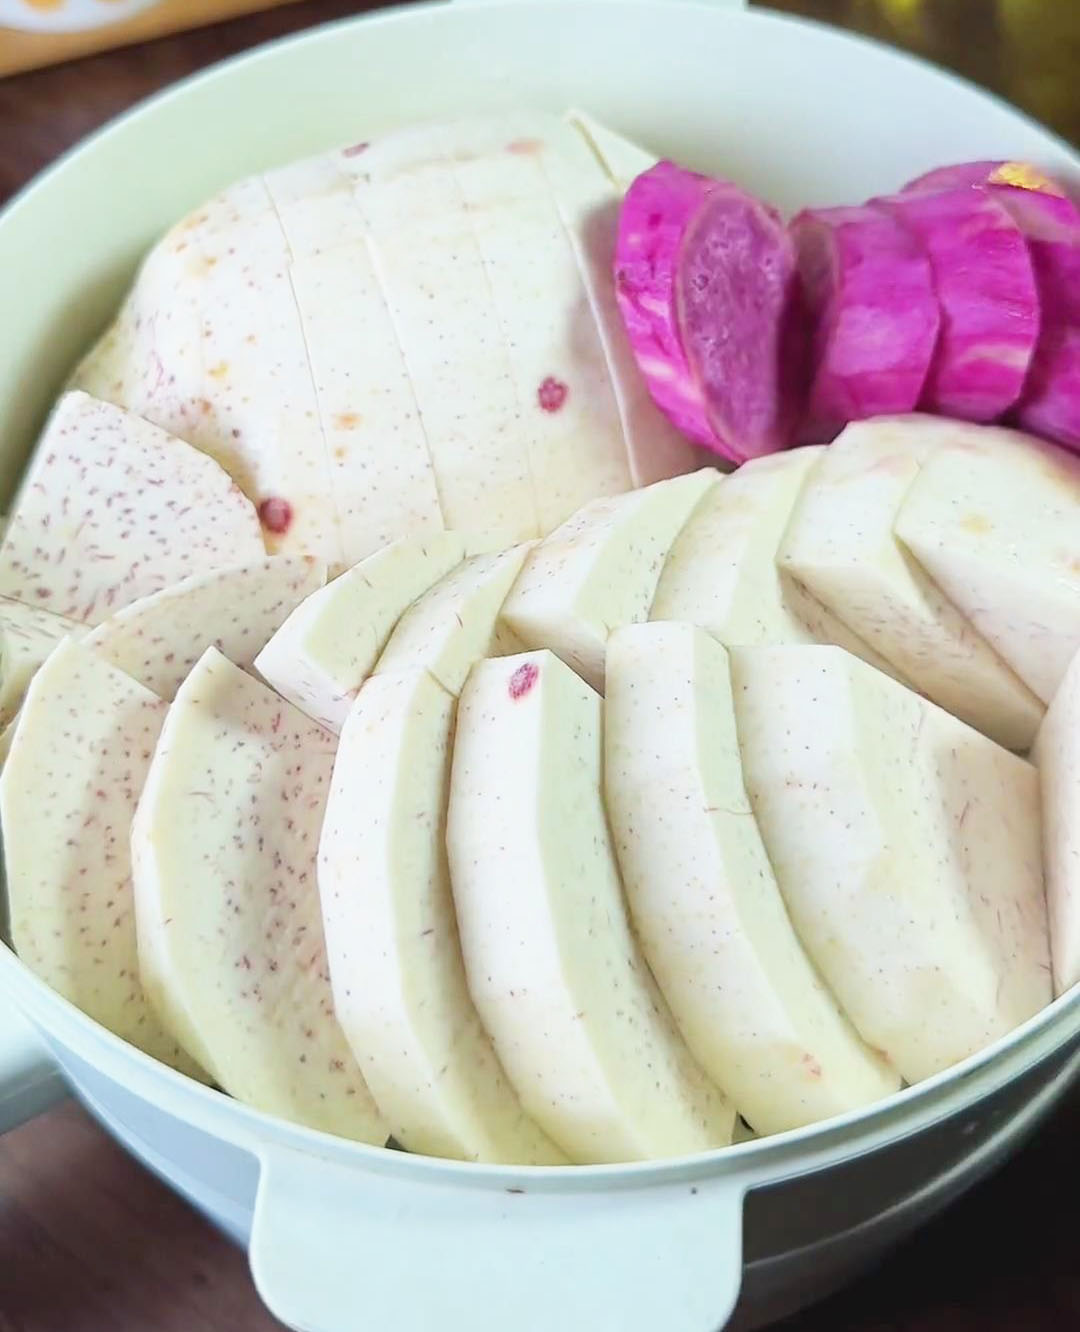

Blend the Paste: Once steamed, place the taro and purple sweet potato into a blender or food processor. Add the condensed milk, butter, and sugar, and blend until smooth. A few lumps are fine, as they’ll dissolve during cooking.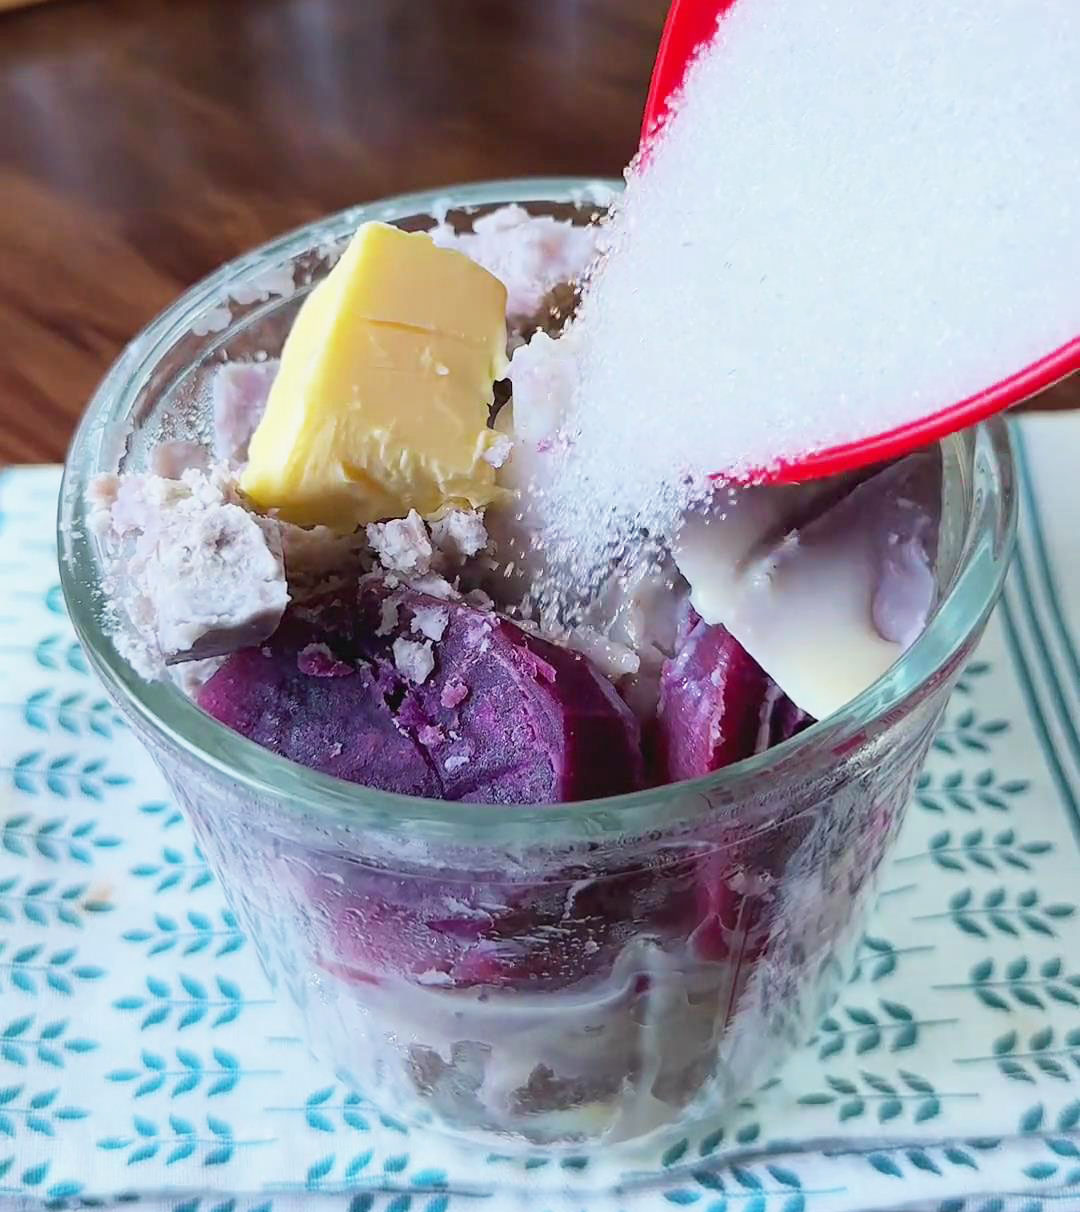
Cook the Paste: Transfer the blended mixture into a non-stick pan. It’s important to use a non-stick pan and keep the heat low.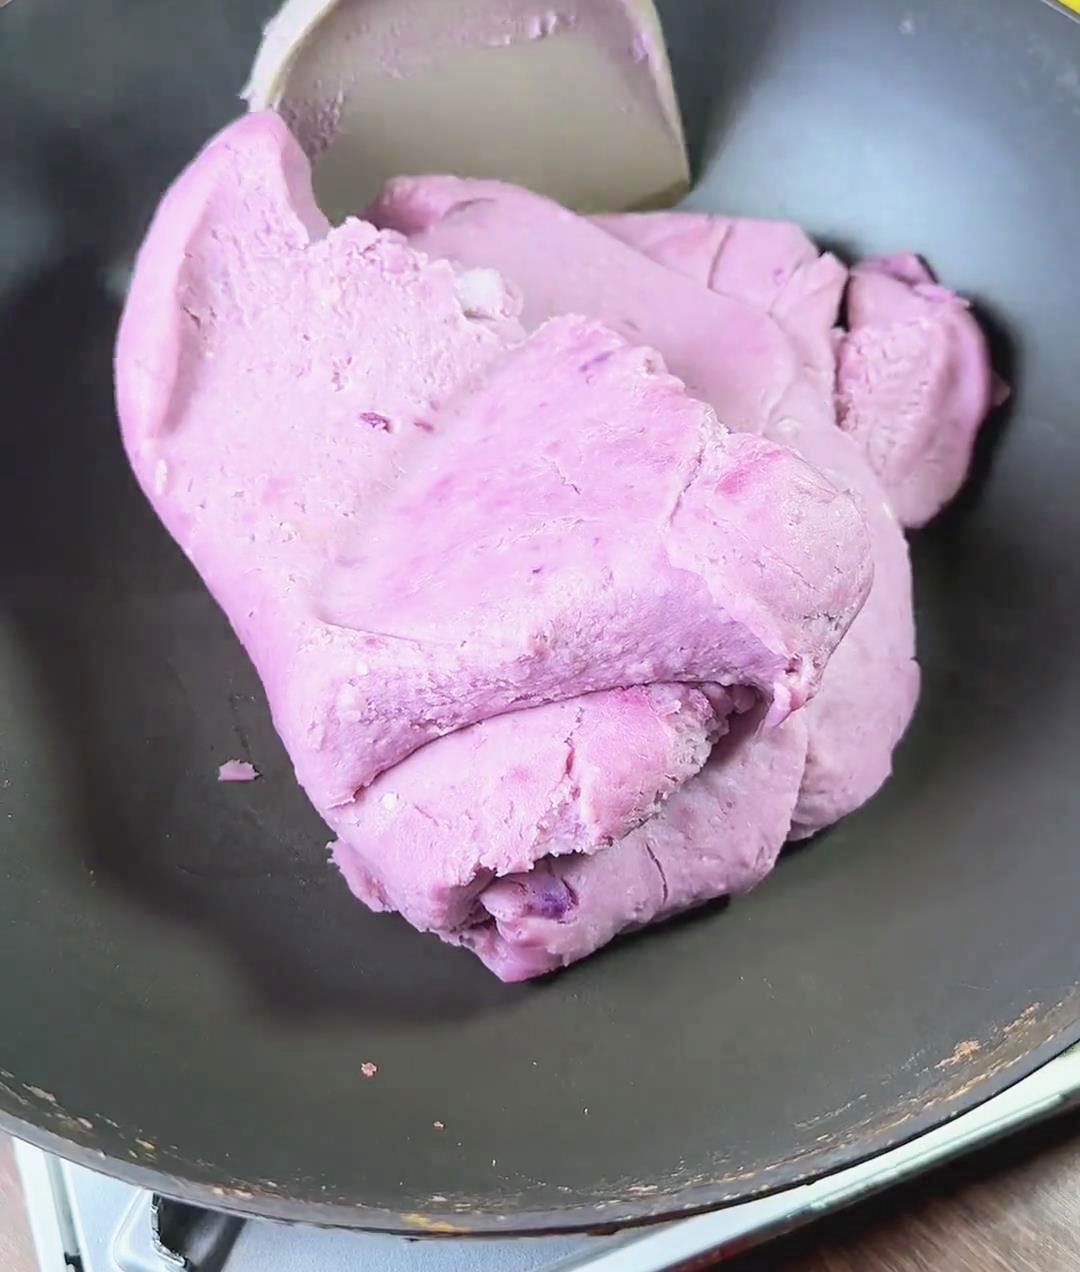
Stir and Cook: Stir constantly while cooking the paste. Cook until it no longer sticks to the pan or spatula and can form a cohesive mass. At this point, the paste is ready.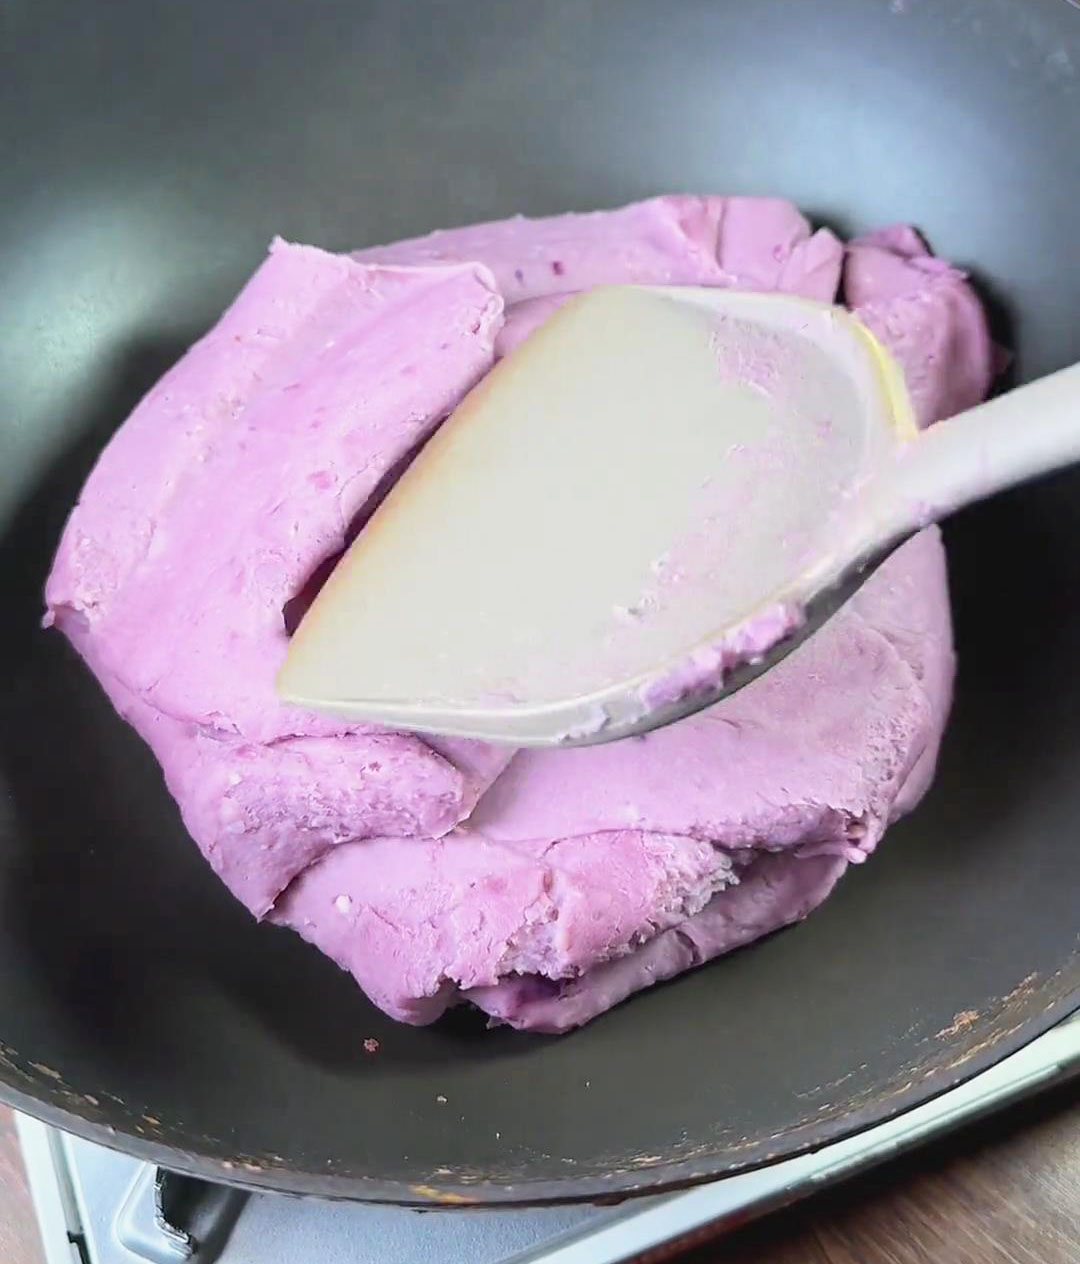
Cool and Store: Place the cooked taro paste into a container, cover the surface with plastic wrap, and let it cool.
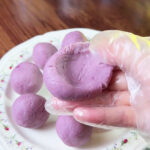
Refrigerate: Once completely cooled, store it in the refrigerator. The paste will firm up and become more moldable, making it perfect for shaping.

Taro Paste Recipe
Ingredients
- 800 g taro peeled and cut into pieces
- 100 g purple sweet potato
- 50 g condensed milk
- 30 g butter
- 100 g sugar
Instructions
- Steam the Vegetables: Steam the peeled taro and purple sweet potato in a pot for 20-30 minutes, until you can easily poke through them with chopsticks.
- Blend the Paste: Once steamed, place the taro and purple sweet potato into a blender or food processor. Add the condensed milk, butter, and sugar, and blend until smooth. A few lumps are fine, as they’ll dissolve during cooking.
- Cook the Paste: Transfer the blended mixture into a non-stick pan. It’s important to use a non-stick pan and keep the heat low.
- Stir and Cook: Stir constantly while cooking the paste. Cook until it no longer sticks to the pan or spatula and can form a cohesive mass. At this point, the paste is ready.
- Cool and Store: Place the cooked taro paste into a container, cover the surface with plastic wrap, and let it cool.
- Refrigerate: Once completely cooled, store it in the refrigerator. The paste will firm up and become more moldable, making it perfect for shaping.


Leave a Reply